
This month’s Avid Baker’s Challenge wasn’t about a specific ingredient—it was about pushing yourself to bake something you’ve always wanted to try but felt unsure about.
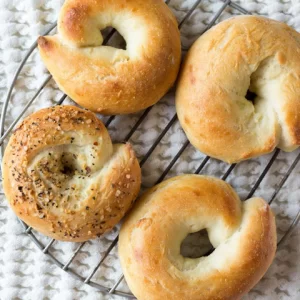
Right away, homemade bagels came to mind. I’ve spent a lot of time searching for the perfect bagel, and this recipe from the updated Joy of Cooking (2019) comes remarkably close!
Bagels are unlike baking bread, cakes, or even doughnuts—but they’re absolutely worth the effort.
The dough itself is easy to prepare, but precise proofing is essential. Let it rise too long, and you risk ending up with dense, heavy bagels.
I found that the proofing times in Joy of Cooking were perfectly accurate, resulting in bagels with a satisfyingly chewy texture and a slightly soft interior.
The key to achieving the perfect bagel is the brief boiling step before baking. Follow the recipe’s timing exactly, and you’ll have great results.
I’ve also mastered kneading yeast dough with my KitchenAid mixer—it’s a real time-saver. Honestly, I find kneading by hand on the counter a bit tedious.
I’ve always admired bakers who say kneading is relaxing and enjoyable, but that’s just not me. Regardless of your method, the key is knowing when the dough is properly developed and ready for shaping and proofing.
This Homemade Bagels recipe suggests kneading by hand for 10 minutes. Instead, I used my KitchenAid and kneaded for 4 ½ minutes. The result? A soft, elastic dough that passed the ‘windowpane test’ when stretched between my fingers.
When shaping the bagels, aim for a smooth surface—while some imperfections will even out, you don’t want wrinkly bagels!
As the dough goes through its final rise, be sure to start boiling your water and preheating the oven. Timing is crucial—just five extra minutes of proofing can affect the final texture.
Once the bagels hit the boiling water, they’ll quickly float to the surface. Gently flip them over, count to 45 seconds, and then lift them out with a slotted spoon, allowing excess water to drain. I like to place them on a baking rack for a minute or two to remove any remaining moisture before baking.

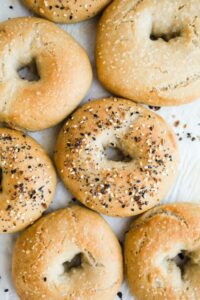
One thing I noticed is that the cornmeal on the baking sheet turns quite brown, but there’s no need to worry—it won’t burn. In fact, it adds a slight crunch to the bottom of the bagels, which enhances their texture.
Years ago, I made pretzel buns that turned out well, but baking these Homemade Bagels was a completely different experience.
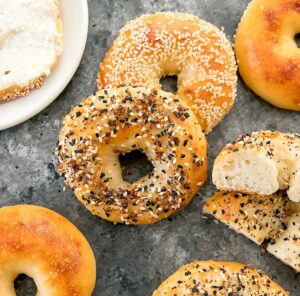
Have I mentioned just how incredible these bagels are?
Since the recipe makes eight, I froze most of them to keep them fresh. When toasted, they came out perfectly crisp and delicious.
I highly encourage you to take on this challenge. I was genuinely surprised at how simple the process was, and I’m absolutely thrilled to have mastered what I consider to be an exceptional bagel!